Modelling
- Finlay
- Nov 29, 2020
- 4 min read
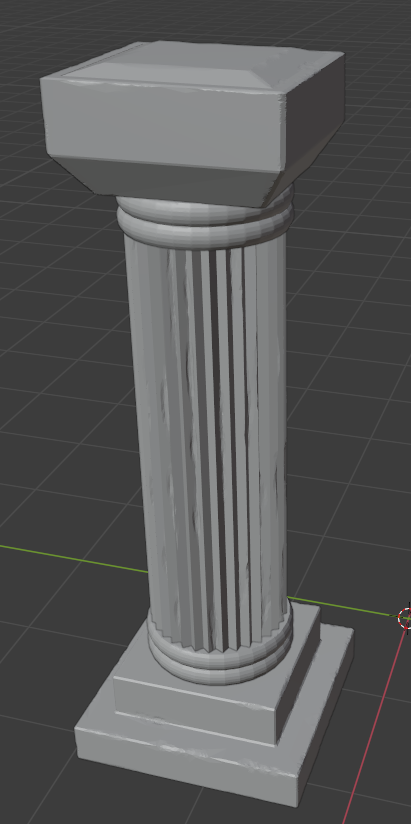
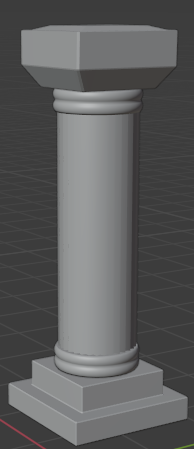
Below is the turn-around of my pillar that I made in the design phase. I chose to put forward this turn-around into blender for the modelling phase:

Before I started modelling the basic primitives I imported my turn-around into blender. This helped me to scale and size the pillar correctly and have it done neatly. To get the turn around in blender I simply added a picture and chose my turn-around like so:

Once I had my turn-around built and in place I was then ready to start making the basic primitives. Making the basic primitives was very simple as I only used two cubes and a cylinder to create the general shape. I had to insert some faces on the bottom base so I could extrude out some more geometry. I also made some cylinders at the top and bottom by adding a subdivision modifier which when scaled out made the cylinders very smooth and more circular. I added an array modifier as well so that the cylinder would duplicate with minimal effort. Finally for the top I added the cube and then stretched down the vertices to create that bevelled shape.

Now that I had achieved the basic shape and structure I was ready to start making a low and a high poly pillar. To start with I duplicated the basic pillar and all its parts and made two version high poly and low poly, this allowed me to add lots of detail on the high poly whilst still having the low poly as a small poly count. The importance of a small poly count for a asset like a pillar is that it needs to take up as little space in the game as possible, this is why we create a high poly that we can take the detail from and bake it over to the low poly whilst still having plenty of detail. I added what's called collections to the pillars so I could organize them into low and high polys effectively, making it easier to organise what was high and what was low poly. So once I had my low poly and high poly I was ready to detail the high poly.

Now that I had my low poly and high poly ready I started to add details to the the three pieces of my pillar. I added the details to both the high and low poly as they both needed the general shape improving.
Firstly I added detail to the base of the pillar, to do this I decided that I wanted the edges to look more defined so I add a modifier. The modifier I chose was bevel because it helps to round off edges and make vertices more detailed. As seen in the picture below I set the bevel to only one segment, this gave it a small amount of detail but just enough that it looked well-done.

Here is the result of the base all bevelled and finished off:

Once I was finished with the bottom I chose to do the same with the top, I followed the exact same process described above and here is the result:

Now I had the top and bottom complete I just had to do the main pillar. To detail the pillar I decided to use the ridged look that I found in my research to make the pillar more 3D, I did this by adding loop-cuts on to the cylinder. Once I had loop-cut the whole way round I selected all the edges and I simply scaled them out, this then made the edges that I put in come out and the ones I had not put in stay in making the shape below:

After I had made the shape above I left-clicked and selected shade smooth witch made it smooth again to match the rest of the pillar like so:

Here is the pillar so far all built up with the newly detailed pieces:

Once I had my detail pillar created, it was time to start sculpting on the high poly. Before I started sculpting I had to turn on Dyntopo, this allows sculpting to reconfigure my polygons in my pillars mesh making the pillar a very high poly model with the sculpting detail.

Now that I had Dyntopo enabled I was ready to sculpt away at my pillar, below are some of the tools I used to create the damaged look on the pillar.

These two tools are what I used to sculpt my models to create the worn effect. The top tool is the Scrape tool which I used the most out of the two, the scrape tool allows for a small scratch like effect which was perfect for the look I was going for on my models. The second tool is the multi-plane scrape, this is the same a scrape just on a big scale that mirrors on to another surface. With these tools I sculpted all of the pillar but in individual pieces as shown below.
Here is the base:

Here is the cylinder detail:

Here is the main pillar:

Here is the top:

Overall the sculpting went very well, all the parts now look more broken and worn-down. The sculpting took place on the high poly model so the low poly still remains without any sculpting but when the UV maps have been made the sculpt will bake over too the low poly in substance when I texture.
Now that I had a complete low poly and high poly I was ready to UV map and then start texturing.
I had to unwrap the low poly instead of the high poly because we want the low poly to be the one that is textured. When unwrapping I had to create seems to unfold the mesh into a 2D format, I did this for each part of the pillar, top middle and bottom:
Top UV map:

Middle UV map:

Bottom UV map:

Now that I had fully unwrapped all the pieces of the low-poly it was now time to hop into substance and start the texturing. The modelling is fully completed for both the high and low poly as shown below.


Comments