Production
- Finlay
- Feb 12, 2021
- 8 min read
Updated: Feb 20, 2021
This part of the project is all about making assets for the engine, like the walls and roofs from the research. Using all my research I will be able to model and texture assets ready to be but in engine in the Post-Production phase. I will be walking you through the process that I take to make and texture these models by capture recording every step of the way for my models. I wont be recording myself making and texturing all the assets as this would consume to much time, instead I will take you through the process of as many assets as I can and explain them in great detail.
Walls
The first asset I will be making is the walls, the walls consist of a main wall and a short wall. Below I shall leave a video of myself creating these walls.
Problem Solving
In the video above you get to see how I made the wall assets, overall I think they work very well and look really nice. When modelling these walls I came into some problems with loop cutting, this is because I would get rid of the edges on the loop cut but when I went back to loop cut again it was no longer a loop but a small edge. I overcame this problem by putting all my loop cuts in before I took away extra edges, a simple mistake with a simple solution. In conclusion I now have some walls that are ready for texturing.
Walls Extended
From finishing the first wall and half wall I decided to create another set of walls that I can use for smaller buildings. This set of walls have finer detail and will look better than the giant walls. In the video below I have explained what I mean by this.
Problem Solving
The video above is of my wall assets that I have main a new version for, I am really happy with how they turned out as I had basically no problems at all. Because of my problem solving in the last video of the wall assets I had learned from my mistake with the loop-cutting so all ran smoothly when creating these new wall variants. The only slight problem I ran into was making the corner walls as it was difficult to try and line them up perfectly, but I soon solved this issue when I took a copy of the wall and trimmed it into a more square shape and used it for guidance this made everything more accurate and gave me the good result that I wanted.
Stairs
The next asset I will be showing the process for is the stairs asset, a simple asset but a important one. The stairs consist of a normal stair and a corner stair. Below is another video showcasing how I made both stairs in a High and Low poly.
Problem Solving
The video above shows me making my stairs assets, overall I think they work well and were really simple to make. I ran in too very few problems with stairs but the one problem I did have got solved quickly. The problem was that when deleting geometry like seen in the video, the vertices and edges would remain and only the faces got deleted. If this had gone unnoticed it would make UV unwrapping a pain so I have learn to always keep and eye out for unneeded geometry.
Floor
This next asset I will be showing the process for is the floor asset, this is by far one of the simplest of the assets I have done so far. The floor is going to be used around and in buildings and next to stairs to act as paths around the Acropolis.
Problem Solving
With the floor tile came very few problems or complications, this is because I am now very familiar with the loop-cut design that I have used over and over again so I make very few mistakes now when modelling. However I had a small problem with the size of the brick pattern as when I paired the floor next to another floor the pattern failed to continue over to the next set of tiles. I over came this problem by taking my time with the pattern and planning out how it would match up and in the end I achieved a nice pattern that continued over multiple floor assets.
Banner
This next asset is of a Banner from my research that represents Athena. This banner is nice and simple but provides a lot of detail as it will be located around the Acropolis. The video below shows a demo of how I made this in blender.
Problem Solving
When creating the banner asset there was only one slight problem, other than that everything ran smoothly and the result was great. The problem was seen in the video as when I come to join the three objects that make up the banner frame, the geometry that has been shaded smooth bugs out and make a weird distortion look on the banner's pole. This thankfully was an easy fix as seen in the video when I join not all three but only two then I join the other piece, this resolved the problem and now the banner is completed.
Window Frame
This next asset is a window frame that I have made out of a copy of my latest wall asset. I have used the wall asset from previously and made it into a frame for a potential window. Below I have left a video displaying what I have done.
Problem Solving
When building this model I had one minor problem, this was that when I made the hole in the middle on a copy of the wall it would bug out and get rid of some geometry that I didn't want to delete. After messing around for awhile I decided it would be smarter to make a new wall and add the hole in with it, this meant that I was not deleting anything as I was just constructing around the hole.
Door Frame
As a continuation to the window frame I have designed a door frame in the same style as the window frame. The door frame can be used to close off areas that aren't meant for players, for example inside some buildings. Below I have left a short video discussing the door frame asset.
Problem Solving
In terms of problems when making this model there was only one thing that made it difficult, this was to do with the bottom part of the model that I had to delete. When I deleted the bottom from the window frame asset there was allot of messy geometry that got in the way. To fix this problem I had to clean up any vertices or edges that were in the way of the gap where the door frame is. Once I had cleaned everything up however I was finished and the door frame wall was complete.
Arch Way
This next asset is an arch way that can join on to the walls I have made to create a very cool entrance to different parts of the Acropolis like the entrance. Below I have left a video about how I have made this assets in low and high poly.
Problem Solving
When making this Arch way asset I faced no problems modelling it at low poly, at high poly however I had one slight issue that I resolved. The problem was that when trying to sculpt on the arch way I would be to far away from the model that I scraped way to much geometry of, this was annoying but I overcame this issue by slowing down my camera movement and focusing on sculpting certain parts of the model in greater detail or less detail depending on how visible they were to the viewer. Overall in the end the model turn out great in bother high poly and low poly.
Roof and Roof Support
The next asset I have made is a roof asset, this include supports on the side and the back and front. I made the supports myself but I used a guide to help make the tiles as I was struggling. The guide was very easy to follow and expanded my knowledge in the modifiers that he covered in the video such as Boolean and lattice grids. Here is the link to the video - https://www.youtube.com/watch?v=ZUF74Qy0AJg&list=WL&index=5
Below I have left a video of me discussing my roof asset in detail and showing it of.
Problem Solving
When making the roof assets I ran into very few problems as modelling the roof was simple and easy because I had a clear guide that I was following. From following this guide I not only got a great looking tile asset but I also began to understand more of what was going on in the video and I became aware of what he was doing with things like modifiers. The one problem I did have was at the end of the video where I was using a Boolean modifier to create a smooth turn, I understood what to do and I did it but I had a strange error that would not let the tiles flow nicely into a turn, instead they were choppy and were missing geometry. Overall I didn't solve the problem but I managed to avoid it and still create a nice looking roof tile.
Texturing
Now that the modelling has been completed the next step is to texture all the models ready to be implemented into Unreal Engine using the standard workflow. When it comes to texturing the models it is very simple as all you need to do is transfer the models UV unwrap to a new Substance painter file and begin texturing, I have used Substance Painter for my last two projects now and I am comfortable with how it works and I can use it effectively. However because of the situation with the COVID-19 and schools shutting down I no longer have access to the Substance Painter software which has left me with some uncertainty to how I will texture my models. I have spent time researching how to texture my models without substance and I decide I would texture in Blender, this slightly resolves the problem with how I am to texture but the quality is nowhere near as good as Substance and the process is more confusing as I cant work out how to use multiple textures on one model. Although I am at a disadvantage not being able to use Substance Painter I have still tried my best to texture my models and move on to the Post-Production phase where I can wrap up this project. With all this said I have left some video of me texturing some of my models.
Stairs
The video below displays how I have textured my stairs model using blender. I have used my research to source an image from that I can texture on to my stairs. This is the exact same process I will be takin with my other models.
Walls
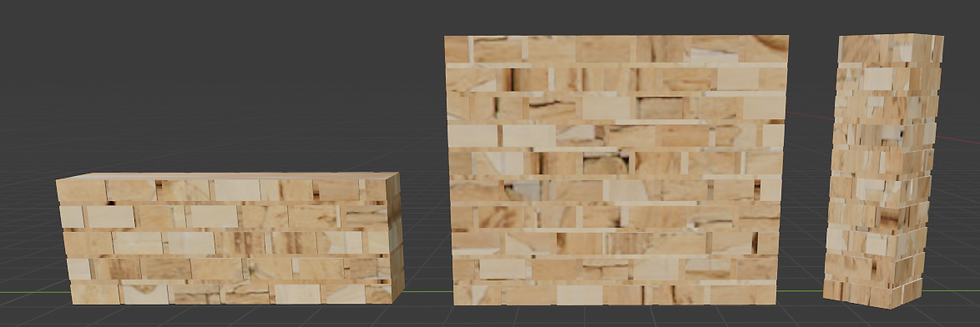
Below are some screenshots of my other models that I have textured using the same method as shown above.

This screenshot is of the first type of wall, this wall has been textured to look like the wall that surrounds the Acropolis. This includes a half wall and a corner wall.

The next type of wall is the building wall, this is textured to look like a standard sandstone wall that is used for the buildings. This also includes a half wall and a corner wall.
Window and Door
The screenshots below are of the window and door asset that have been design to have the same texture as the building wall above.

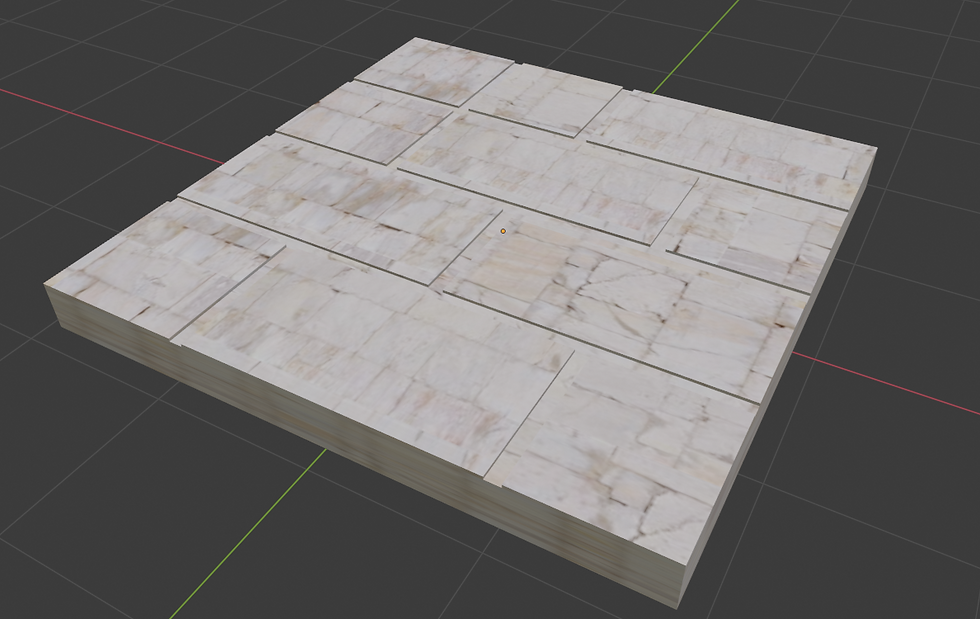
Floor
This next screenshot is of a floor tile that has been textured to match the stair asset.

Arch Way
This next screenshot is of an arch way asset that I have textured with a marble effect.

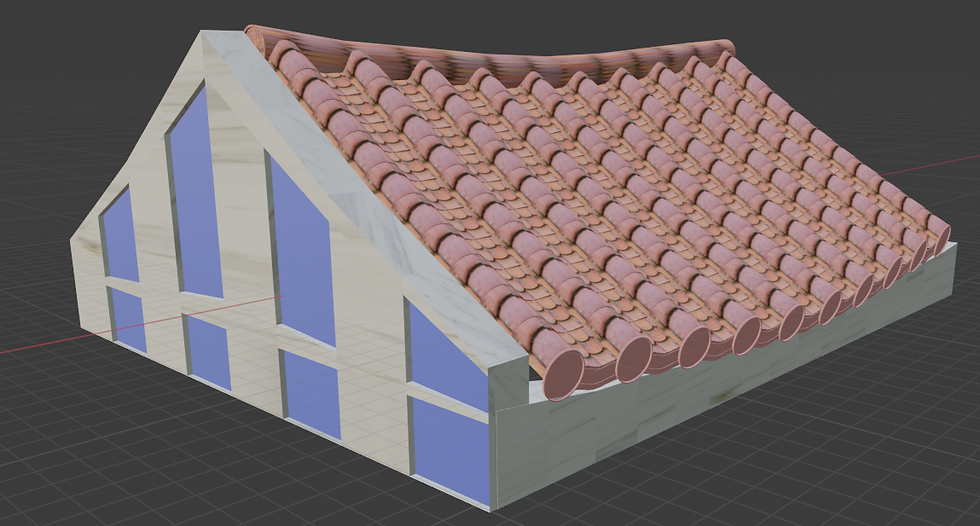
Roof and supports
This screenshot is off the different parts of the roof asset that I have textured this includes the support as well as the roof tile itself. I have textured the supports in marble and added some blue details to match the research and for the tiles I have used the tile material.

Banner
The final screenshot is of the banner asset which I have textured. The frame is textured in brown and gold and for the actual banner I have used my final design from the research to texture with.

With all of the texturing for my models completed it is time to end the production phase and move on to the Post-production phase where I am to implement everything into the engine in a professional work flow to wrap up and complete this project. Overall the production phase has been mostly successful as my models all turn out great but unfortunately due to the lack of software I cannot say that the texturing was a success as I think that they are not very well done and I would have done a far better job if I was using substance painter.


Comments